
To maintain healthy and flexible lower body muscles, the windmill stretch is an essential exercise to include in your fitness routine.
This straightforward and efficient stretch offers numerous benefits, such as improved flexibility, decreased injury risk, and enhanced overall lower body function.
In this article, we will delve into the merits of the windmill stretch, the body parts it targets, the equipment required, the steps to perform the stretch, and the mistakes to avoid.
By incorporating this stretch into your fitness routine, you can improve your mobility and promote overall leg health.
Benefits of the Windmill Stretch Exercise
The windmill stretch provides several advantages, including:
Improved Flexibility: The windmill stretch helps to enhance flexibility in your hamstrings, hip flexors, and calves, making running and other lower-body activities more comfortable and efficient.
Reduced Injury Risk: Regularly practicing this exercise can help prevent injuries such as strains or pulls by keeping your muscles limber and healthy.
Enhanced Athletic Performance: The windmill stretch can contribute to better athletic performance by allowing for a greater range of motion and more efficient muscle function.
Faster Recovery: Stretching your lower body muscles can aid in muscle recovery, reducing post-workout soreness and stiffness.
Better Posture: By maintaining flexibility in your lower body, you can also promote better posture and alignment.
What Body Parts are Impacted by the Windmill Stretch Exercise?
The windmill stretch primarily targets the hamstrings muscles at the back of your thighs, which can become tight from running or prolonged sitting.
Additionally, the stretch provides a gentle stretch for your hip flexors, promoting better hip mobility, and helps keep your calf muscles flexible and ready for action.
Equipment You Need to do the Windmill Stretch Exercise
The windmill stretch requires minimal equipment. All you need is a supportive surface. Whether it’s a yoga mat, carpet, or grass, choose a surface that provides enough support and grip for your feet during the stretch.
Steps for Completing the Windmill Stretch Exercise
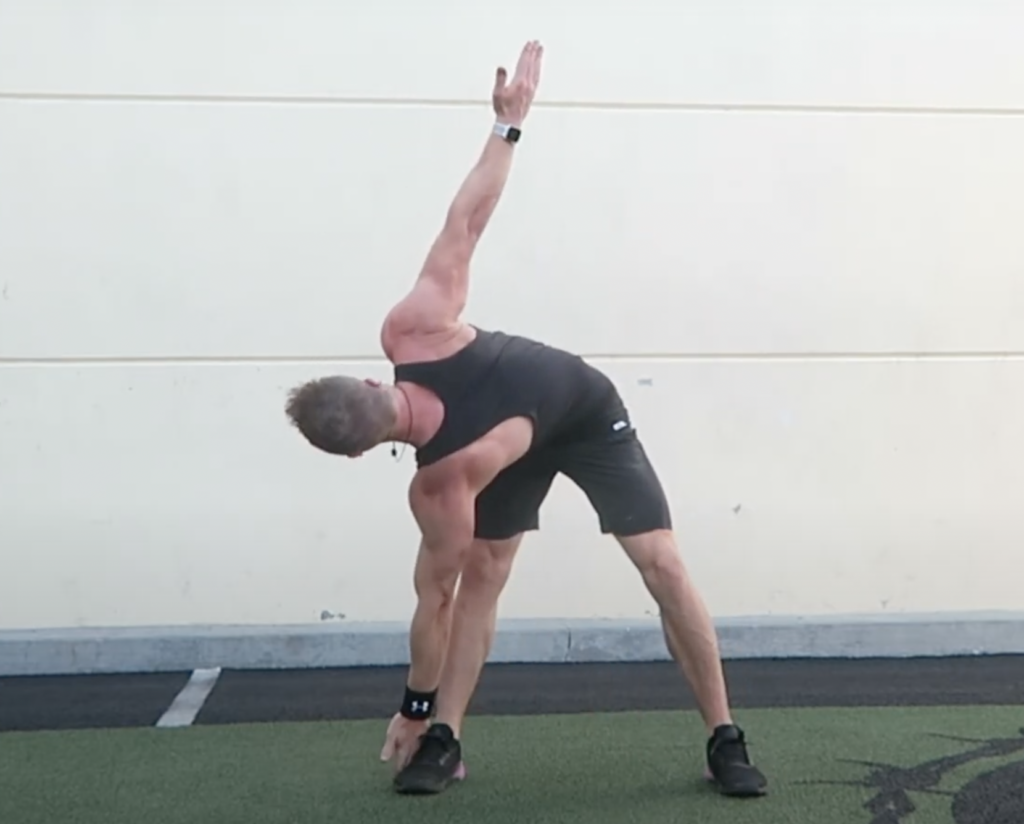
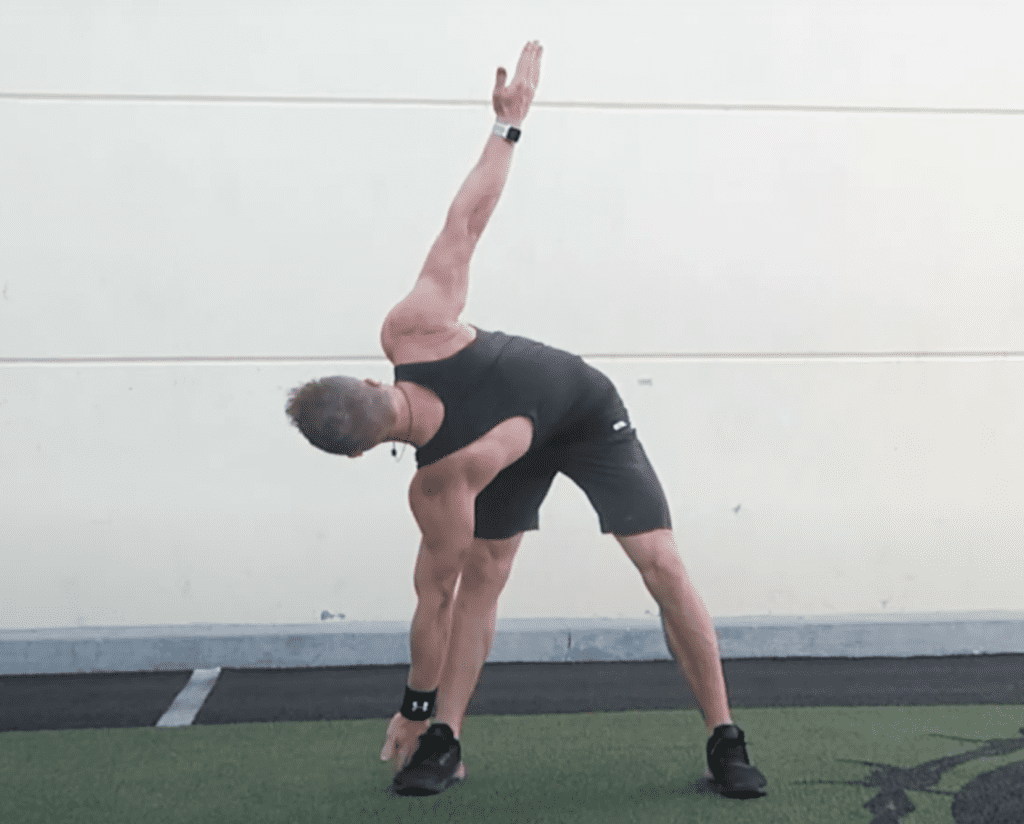
Step 1: Begin by standing upright with your feet shoulder-width apart and your arms extended out to the sides, parallel to the ground. Engage your core muscles to aid in balancing.
Step 2: Slowly bend at the waist and lower your left hand towards your right foot, keeping your legs straight but not locked. Your right hand should be pointing towards the sky.
Step 3: Gently reach your left hand towards your right foot, keeping your spine straight and your gaze focused on your right hand. You should feel a stretch in your hamstrings and lower back.
Step 4: Hold this position for 10-20 seconds while taking deep breaths. Avoid bouncing during the stretch to prevent unnecessary strain.
Step 5: Slowly rise to the starting position and repeat the process on the other side, reaching your right hand towards your left foot. Ensure that both sides get an equal opportunity to stretch and relax.
Keep your movements smooth and controlled, and avoid rushing through the stretch. Remember to listen to your body and stop the stretch immediately if you experience any discomfort or pain.
Consistent practice of the windmill stretch can enhance flexibility and mobility, making it a valuable addition to any workout routine.
Here is a video on how to complete the windmill stretch.
Mistakes to Avoid while doing the Windmill Stretch Exercise
To get the most out of your windmill stretch, avoid these common mistakes:
Bouncing: Avoid bouncing during the stretch, as this can cause unnecessary strain on your muscles. Instead, maintain a steady and controlled movement.
Overstretching: Remember that the goal is to find a comfortable stretch, not to force your body into an uncomfortable position. Gently ease into the stretch and avoid pushing your body beyond its limits.
Rounding Your Back: Maintain a straight spine during the stretch, avoiding the temptation to round your back or hunch your shoulders.
Locking Your Joints: Keep a slight bend in your knees and avoid locking them, as this can put unnecessary strain on your joints.
Not Engaging Your Core: Keep your core engaged throughout the stretch, which will help you maintain balance and promote proper alignment.
Conclusion
The windmill stretch is an effective way to improve flexibility, reduce injury risk, and enhance overall lower body function. By incorporating this stretch into your fitness routine, you can improve your mobility and promote overall leg health.
Whether you’re an avid runner or just someone looking to improve your daily comfort and mobility, the windmill stretch is an essential addition to your routine.
So, go ahead and make those hamstrings and calves sing with joy as you stretch your way to stronger, more flexible legs! Use this stretch after completing some squats, and here’s to a great workout!

Pingback: The Child's Pose: Unwind And Destress - The Go To Website For Fitness Learning