
Are you tired of traditional workouts and seeking an exercise that’s both simple and effective? Look no further than planking! This exercise has taken the fitness world by storm, and for good reason.
It targets multiple muscle groups, can be done anywhere, and requires minimal equipment. In this power-packed article, we’ll dive into the benefits of planking, the body parts impacted, essential equipment, step-by-step instructions, and common pitfalls to avoid.
Benefits of Planking
Planking is a phenomenal exercise for strengthening your core muscles, including the rectus abdominis, transverse abdominis, and obliques.
A stronger core can lead to improved posture, a reduced risk of back pain, and enhanced athletic performance. But that’s not all!
Besides the core, it can also enhance overall body strength. This all-in-one exercise engages muscles in the shoulders, back, arms, and legs, building endurance, boosting flexibility, and refining muscle definition.
Moreover, planking can improve balance and stability, as maintaining a plank position requires a stable, balanced body. And if you’re looking to shed some pounds, planking is your new best friend.
This high-intensity exercise can torch calories and kick your metabolism into high gear.
What Body Parts are impacted by planking?
Planking is a full-body workout that engages a multitude of muscle groups, including:
Core: Abs, obliques, and lower back muscles are all targeted.
Shoulders: Planking works the deltoids and rotator cuff muscles.
Back: Strengthen your erector spine, rhomboids, and trapezius muscles with planking.
Arms: Biceps, triceps, and forearms all benefit from planking.
Legs: Planking engages the quadriceps, hamstrings, and glutes.
Equipment You Need for Planking
The beauty of planking lies in its minimal equipment requirements. A comfortable surface to plank on is all you need. Many prefer using a yoga mat for extra comfort and support.
Steps for Planking
Ready to conquer planking? Follow these steps:
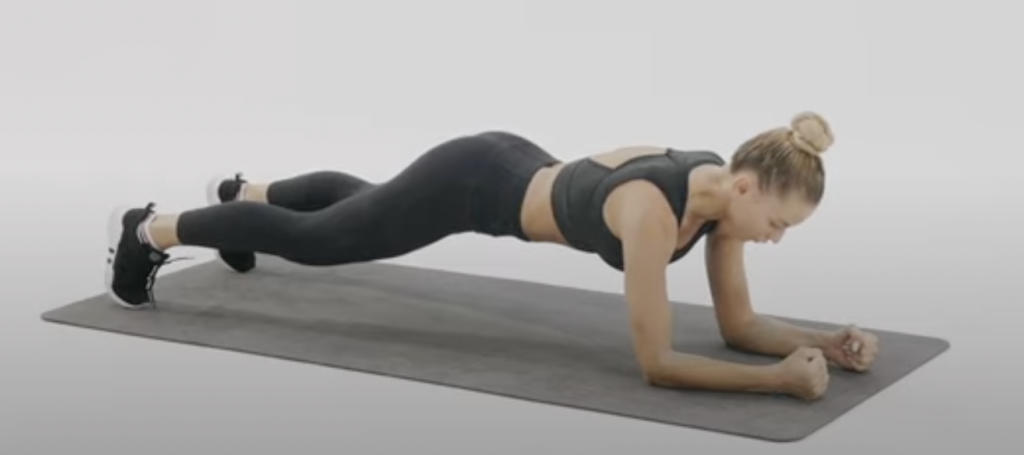
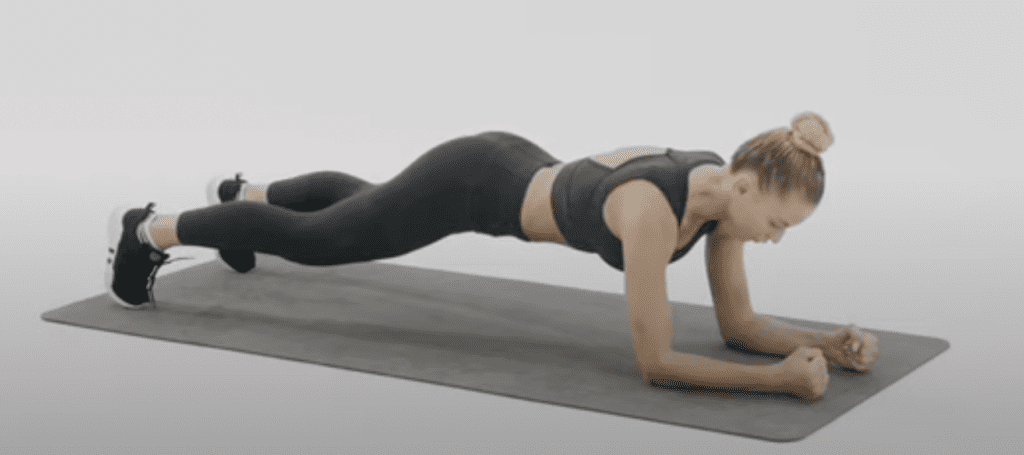
Step 1: Begin in a push-up position with your arms fully extended, and your hands placed shoulder-width apart on the floor. Ensure that your wrists are aligned directly beneath your shoulders for proper support and stability.
Step 2: Gently lower your body onto your forearms, positioning your elbows directly beneath your shoulders. Your forearms should be parallel to one another, and your palms should be flat on the floor.
Step 3: Engage your core muscles and maintain a straight body line from head to toe. Keep your hips level, and back flat, and avoid any sagging or arching. Your feet should be hip-width apart, with toes curled under and pressing into the floor.
Step 4: Hold this plank position for as long as you can, aiming for a minimum of 30 seconds initially. As you build strength and endurance, gradually increase the duration of your planks.
Step 5: When you’re ready to exit the plank, slowly and carefully lower your body back to the starting push-up position, ensuring a controlled descent to protect your joints and muscles.
Step 6: Repeat the plank exercise for several sets, working toward a total of 2–3 minutes of cumulative planking time. Allow for brief rest periods between sets to help maintain proper form and prevent fatigue-related mistakes.
The video below shows how to complete the planking exercise.
Mistakes to Avoid while Planking
Steer clear of these common planking mistakes to keep it safe and effective:
Sagging hips: To prevent lower back strain, it’s crucial to maintain your hips level with the rest of your body. Imagine a straight line running from your head to your heels, and make sure your hips don’t dip below that line.
Holding your breath: It’s essential to focus on your breathing while holding the plank position. Inhale deeply and exhale steadily throughout the exercise, ensuring a continuous flow of oxygen to your muscles.
Arching your back: A common mistake is arching the back, which can cause strain on the lower back. To avoid this, engage your core muscles and maintain a flat back while planking. Picture a flat surface resting on your back to help maintain the proper alignment.
Tensing your neck: Neck strain can occur if you’re tensing your neck muscles or looking up during the plank. Keep your neck relaxed, and focus your gaze on the floor about one foot in front of your hands.
This will help maintain a neutral alignment for your neck and spine.
Overarching your shoulders: Shoulders play a significant role in maintaining proper form during planking. Avoid hunching or overarching your shoulders by keeping them relaxed and positioned directly above your elbows.
This will help distribute the weight evenly and reduce the risk of a shoulder injury.
Conclusion
In a nutshell, planking is an incredibly effective exercise for boosting core strength, balance, stability, and overall body strength. It works wonders for multiple muscle groups, from the core to the legs, and can be performed anywhere with minimal equipment.
By perfecting your form and dodging common mistakes, planking can become an indispensable part of your fitness journey. So, the next time you hit the gym or exercise at home, embrace the plank revolution and experience the transformative benefits for yourself.
It has the power to unleash your true potential, redefine your fitness routine, and lead you toward a stronger, healthier, and more confident version of yourself. Don’t wait any longer – start planking today and see the difference it can make in your life!
For a full-body workout, the star jump exercise is a great combination with planking.

Pingback: Leg Raises: Revitalize Your Lower Body Workout - The Go To Website For Fitness Learning