
In the world of fitness, we are always looking for new ways to build strength, tone our muscles, and increase our endurance. While many exercises focus on the major muscle groups, it’s important not to neglect the smaller, more delicate muscles in our bodies.
The seated wrist curl targets the wrist flexors and extensors, helping to increase grip strength and improve wrist mobility.
Benefits of the Seated Wrist Curl
The seated wrist curl is a fantastic exercise for those looking to improve their grip strength. Whether you’re an athlete looking to enhance your performance or someone who wants to be able to carry your groceries more easily, grip strength is a significant factor to consider.
By working the wrist flexors and extensors, the seated wrist curl helps strengthen the muscles responsible for gripping, allowing you to hold on to heavier weights or objects for longer periods.
In addition to improving grip strength, the seated wrist curl can also help to improve wrist mobility. As we age, our joints can become stiff and less flexible, leading to discomfort and pain.
By performing exercises that target the wrist, we can help to keep our joints supple and mobile, reducing the risk of injury and improving our overall quality of life.
What Body Parts Are Impacted by the Seated Wrist Curl?
The primary muscles targeted by the seated wrist curl are the wrist flexors and extensors located in the forearm. However, this exercise can also indirectly impact other muscle groups, such as the biceps and triceps.
By holding a weight and curling the wrist up and down, you are also engaging these larger muscle groups, helping to build overall upper body strength.
Equipment You Need to do the Seated Wrist Curl
You’ll need a few pieces of equipment to perform the seated wrist curl with a barbell. First, you’ll need a sturdy chair or bench to sit on. You’ll also need a barbell loaded with weights that you can hold comfortably in one hand.
It’s important to start with a lighter weight and gradually work your way up to avoid injury.
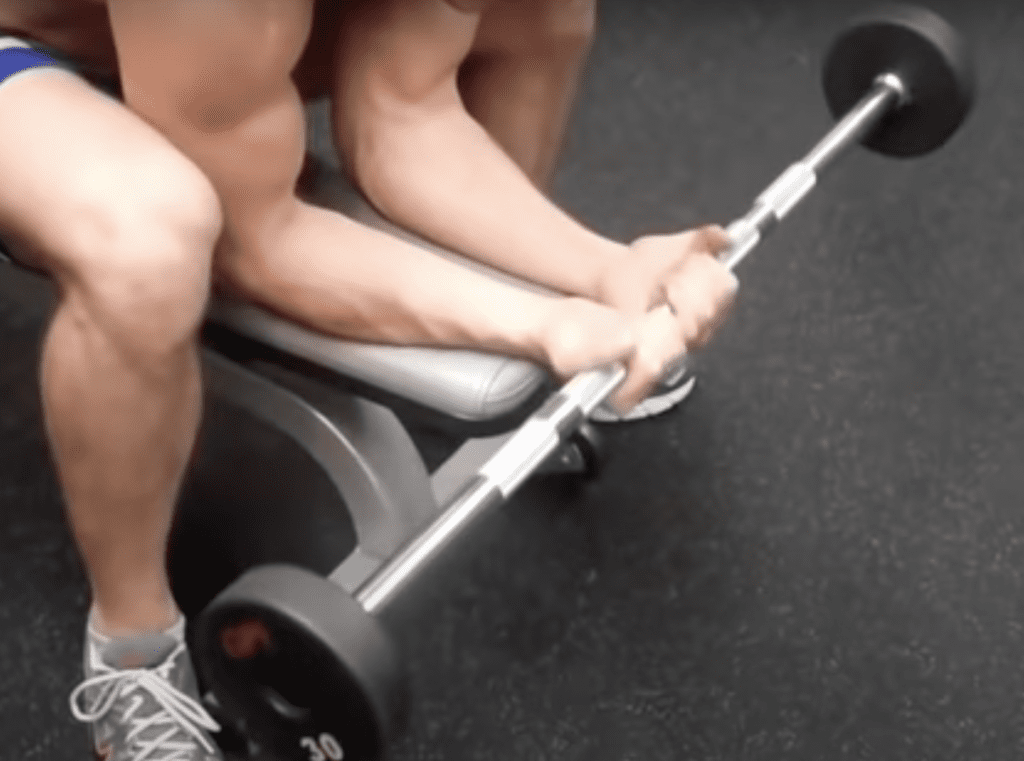
Here are the steps for doing the seated wrist curl with a barbell:
Step 1: Begin by sitting on a chair or bench, ensuring your feet are firmly planted on the ground and your back is straight.
Step 2: Hold the barbell using an underhand grip with your palms facing upwards and your hands placed shoulder-width apart.
Step 3: Place your forearms on a flat surface, such as a table or bench, with your wrists hanging off the edge.
Step 4: Slowly raise your wrists, curling the barbell towards your forearms. Hold this position for a second at the top of the movement.
Step 5: Slowly lower the barbell back down to the starting position.
Step 6: Repeat the exercise for 10-15 repetitions, ensuring that you maintain proper form throughout the movement.
If you’re new to using a barbell for wrist curls, getting used to the movement may take some time. Make sure to start with a light weight and focus on maintaining proper form throughout the exercise.
Check out this video on how to complete the exercise.
Mistakes to Avoid while doing the Seated Wrist Curl with a Barbell
There are a few common mistakes to avoid when doing the seated wrist curl with a barbell. First, make sure to keep your elbows and forearms stationary throughout the movement.
It’s also important to avoid using too heavy of a weight, which can lead to wrist and forearm pain. Lastly, don’t rush through the exercise – focus on slow and controlled movements for maximum benefit.
Mistakes to Avoid while doing the Seated Wrist Curl
While the seated wrist curl is a relatively simple exercise, there are a few common mistakes to avoid, ensuring that you are performing the movement correctly and safely. Here are a few things to keep in mind:
Don’t use too heavy of a weight. Starting with a weight that is too heavy can put unnecessary strain on your wrist and forearm muscles, leading to injury.
Keep your forearm steady. It’s significant to keep your forearm still during the movement to isolate the wrist flexors and extensors.
Avoid jerky movements. Moving too quickly or jerking the weight up and down can put additional stress on your wrist and forearm muscles, leading to strain and injury.
Don’t forget to breathe. It’s important to breathe deeply and steadily throughout the movement to ensure that your muscles are getting enough oxygen.
Conclusion
In conclusion, the seated wrist curl is a simple yet effective exercise that targets the muscles in your forearms and wrists. Regularly incorporating this exercise into your workout routine can improve your grip strength, wrist mobility, and overall upper body strength.
Whether you’re using a dumbbell or a barbell, make sure to start with a lighter weight and focus on maintaining proper form throughout the movement. With consistency and dedication, you’ll be amazed at how quickly you can build strength in your wrists and forearms.
So why not give the seated wrist curl a try and see the results for yourself? Your hands and arms will thank you!
Check out this chest fly exercise for more fun workouts.